The EPIC Roles Screen
Clicking the Next button in the EPIC Services screen (see The EPIC Services Screen) opens the EPIC Roles screen, which is where you describe the pod roles that will be included in this application and assign services to those roles.
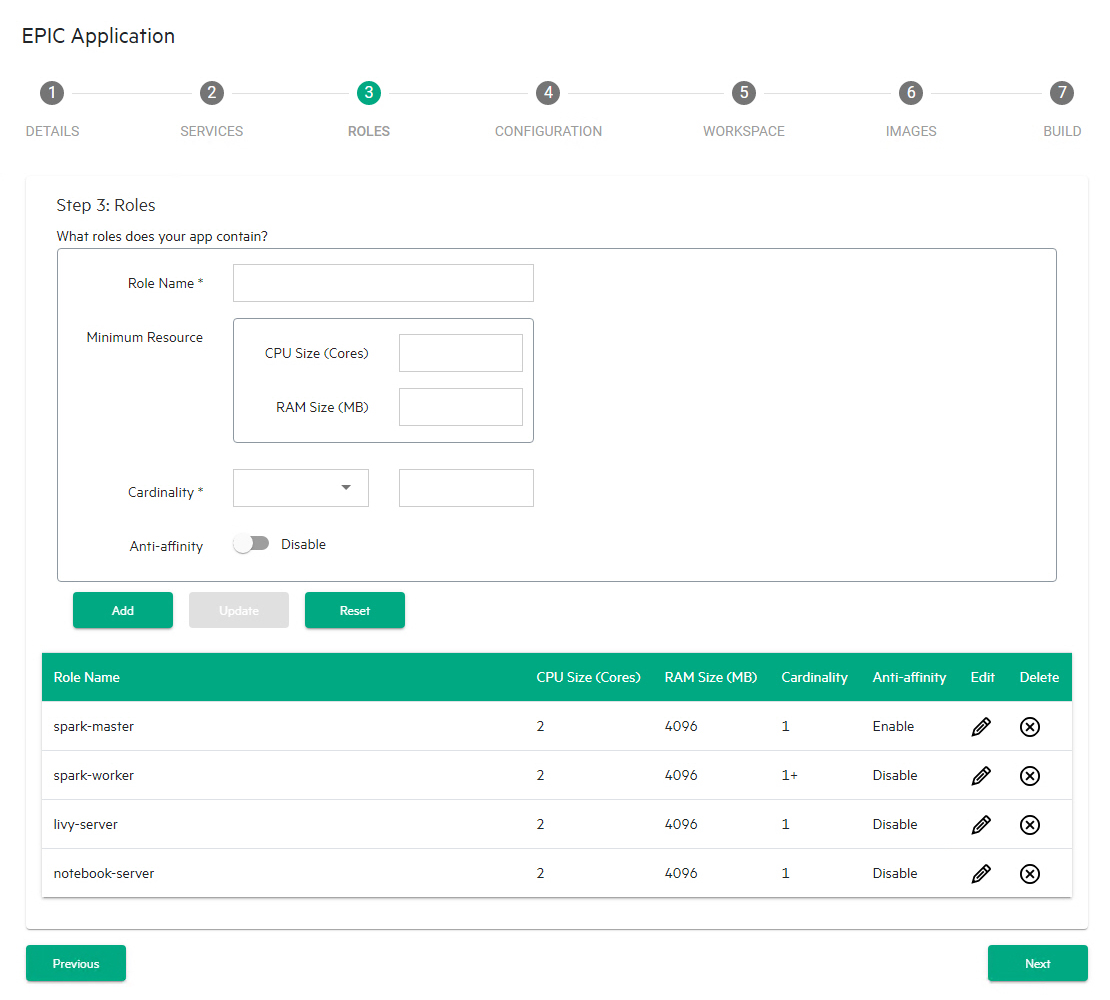
The What roles does your app contain? section of the screen allows you to:
- Add a new role: See Adding a New Role.
- View roles: See Viewing Roles.
- Edit an existing role: See Editing an Existing Role.
- Remove a role: See Removing a Role.
When you have finished defining the services for your application, click Next to proceed to the EPIC Configuration screen. See The EPIC Configuration Screen.
Adding a New Role
To add a new role:
- Enter the name of the role in the Role Name field. This will specify the name of the virtual node/container/pod.
- If desired, enter the minimum number of virtual CPU cores to use for this role in the CPU Size (Cores) field.
- If desired, enter the minimum amount of RAM in MB to use for this role in the RAM Size (MB) field.
- Enter the number of virtual nodes to be deployed for this role in the
Cardinality field.
- If you enter an integer, then a fixed
number of virtual nodes. For example, entering
2means that two virtual nodes of this role will be deployed. - If you enter an integer followed by a plus sign (+),
then the integer specifies the minimum number of virtual nodes that will
be deployed with this role. You may scale this out when deploying
clusters/pods. For example, entering
2+means that at least two virtual nodes of this role will be deployed; you may deploy a larger number if you choose.
- If you enter an integer, then a fixed
number of virtual nodes. For example, entering
- By default, anti-affinity physically separates each virtual node with this role from its peers, thereby lessening the odds that a fault affecting one virtual node will affect the other virtual node(s). This feature also reduces the physical resources used by virtual nodes. To disable this feature, slide the Anti-affinity switch to the Disabled position.
- Click the Add button to add the new role.
You may now:
- View the role, as described in Viewing Roles.
- Edit the role, as described in Editing an Existing Role.
- Remove the role, as described in Removing a Role.
Viewing Roles
The table at the bottom of the EPIC Roles screen appears when you have defined at least one role for this application. This table displays the following information for each role:
- Role Name: Name of the role, which specifies the name of the virtual node/container/pod.
- CPU Size (Cores): If specified, the minimum number of virtual CPU cores to use for this role.
- Ram Size (MB): If specified, the minimum amount of RAM in MB to use for this role.
- Cardinality: Number of virtual nodes to deploy for this role. This can be either an absolute number (if the cardinality is an integer) or a minimum (if the cardinality is an integer followed by a plus sign (+)).
- Anti-affinitity: Whether (Enable) or not (Disable) anti-affinity is active for this role.
- Edit: Clicking the Edit icon (pencil) for a service allows you to edit that role. See Editing an Existing Role.
- Delete: Clicking the Delete icon (X) for a service removes that role. See Removing a Role.
Editing an Existing Role
To edit an existing role:
-
In the table at the bottom of the EPIC Roles screen, click the Edit icon (pencil) for the role you want to edit.
The top of this section populates with the current information for the selected role.
- Make your desired changes. See Adding a New Role for information on what to place in the fields.
- Either:
- Click Add to save your changes as a new role.
- Click Update to save your changes to the existing role.
- Click Reset to cancel your changes without modifying the role.
Removing a Role
To remove a role, click the Delete icon (X) for the role you want to remove in the table at the bottom of the EPIC Roles screen.