Configuring STS for Data Fabric
Describes how to configure the AWS role and enable STS when you import an external S3 object store into the global namespace of the HPE Ezmeral Data Fabric.
- Configure the role in your AWS environment. See Configuring a Role for Data Fabric in AWS.
- Use one of the following procedures to import the external AWS
S3 object store:
- Command line procedure: Importing the External AWS S3 Object Store by Using the maprcli Command
- Data Fabric UI procedure: Importing an External S3 Object Store
Prerequisite for Configuring STS
Enabling STS requires Keycloak to be deployed on a public network IP address so that AWS STS can communicate with Keycloak and verify that the JWT tokens are from the Data Fabric software. If your Keycloak deployment resides on an intranet and is not reachable by a public network, you cannot use STS. However, you can still use the access key and secret key import method.
For other STS limitations, see Integrating the AWS Security Token Service (STS) with Data Fabric.
Configuring a Role for Data Fabric in AWS
- Navigate to the Identity and Access Management (IAM) dashboard:
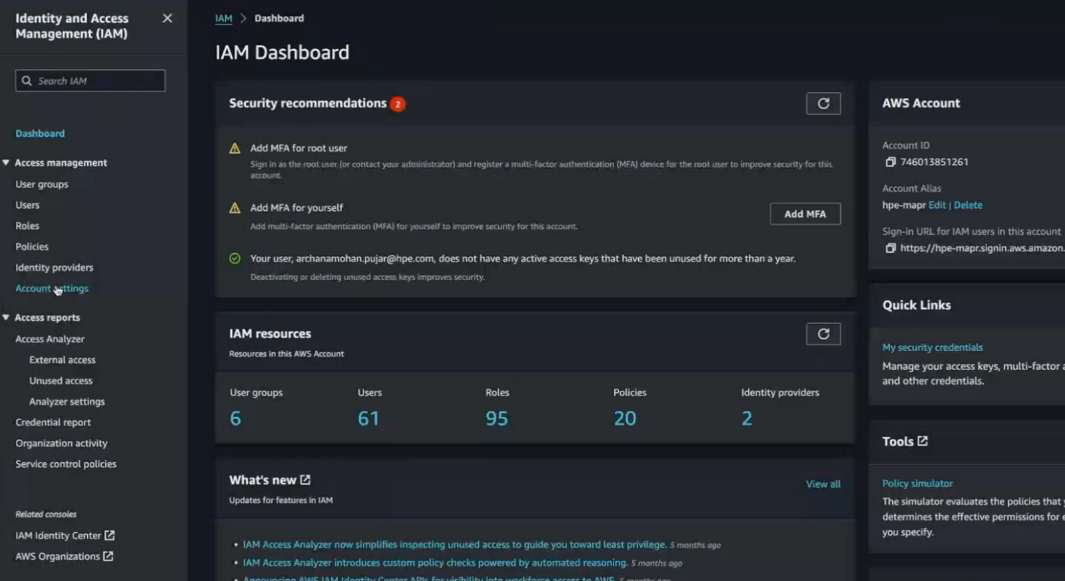
- In the left-navigation pane, click Identity providers.
- Click Add provider.
- Click OpenID Connect:
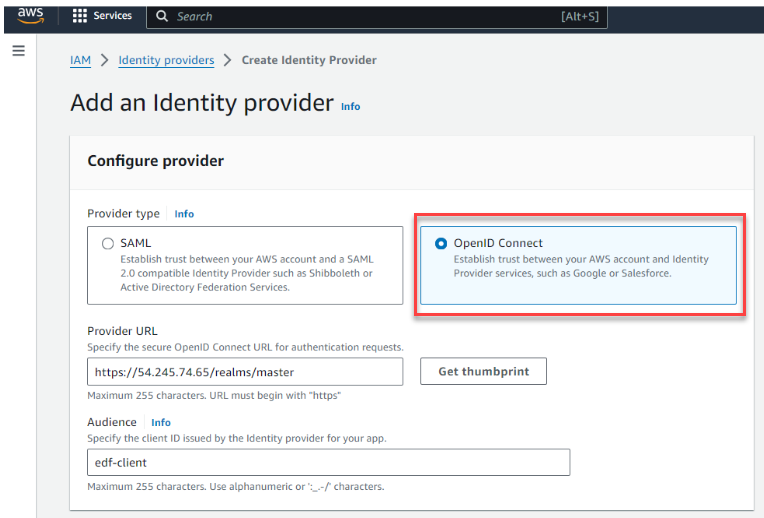
This screen enables you to create an external identity provider and specify the type asOIDC. - Specify the provider URL:
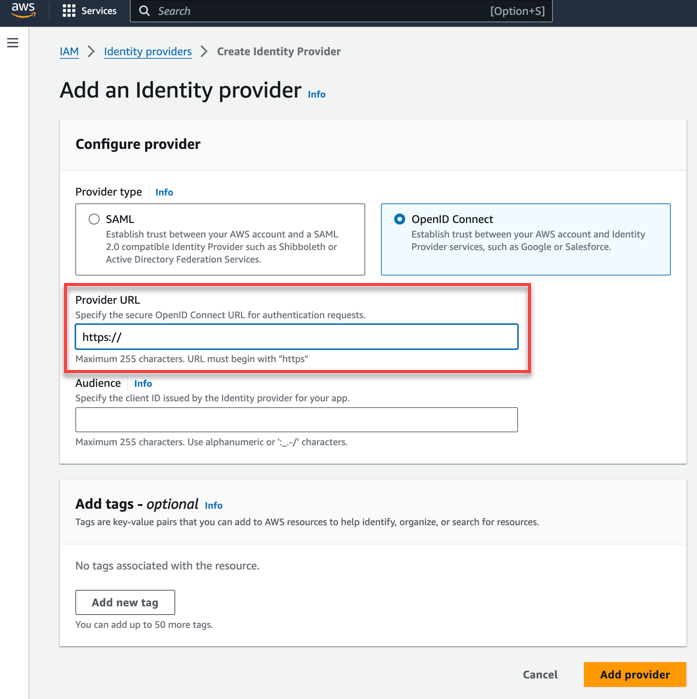
You can obtain this URL from the SSO setup card of the Data Fabric UI: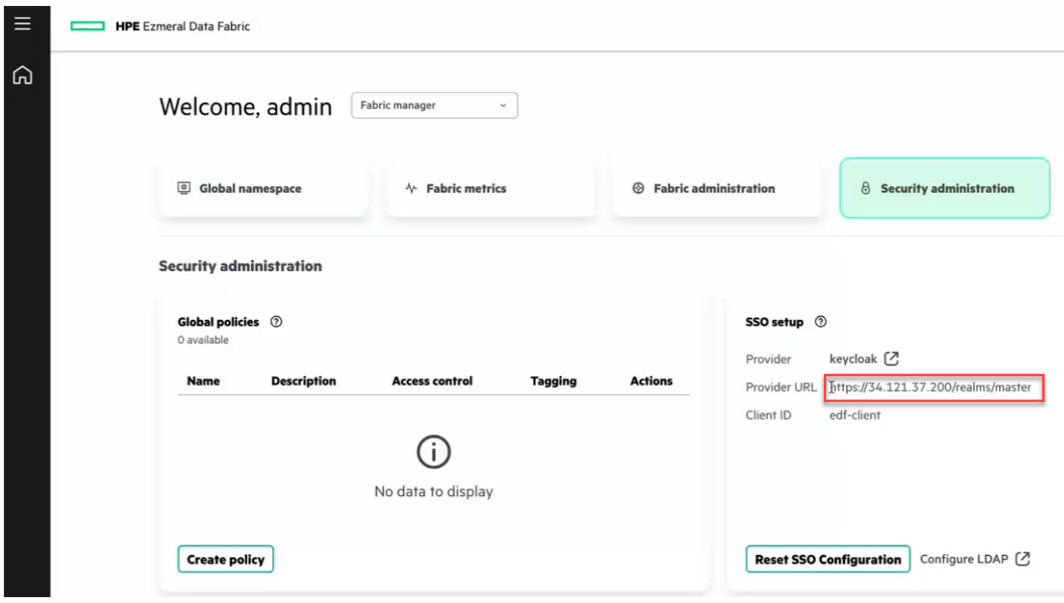
- Set the Audience field to edf-client, and click Add provider. The new provider is added to the list of providers on the Identity providers page.
- In the left-navigation pane, click Roles to create a role.
- For the trusted entity type, click Web
identity:
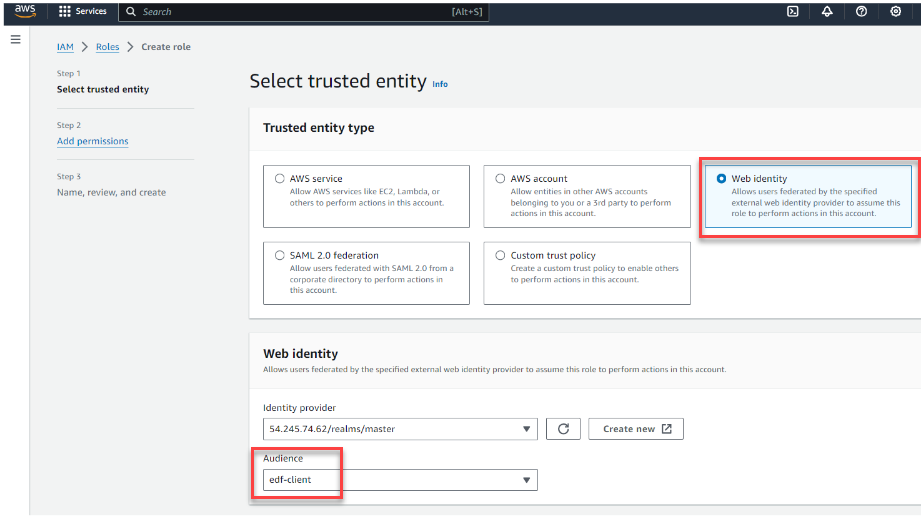
- Select the identity provider that you created in the previous step, then verify that the Audience is edf-client.
- Click Next.
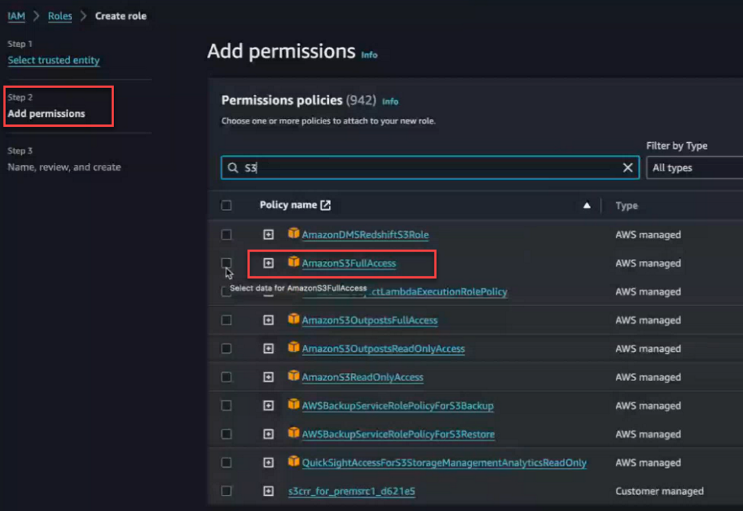
- Add the permission policies that are applicable for this role. Any entity
assuming this role will have these permissions. Specify
AmazonS3FullAccess:
- Click Next.
- Provide a name for the role. For example:
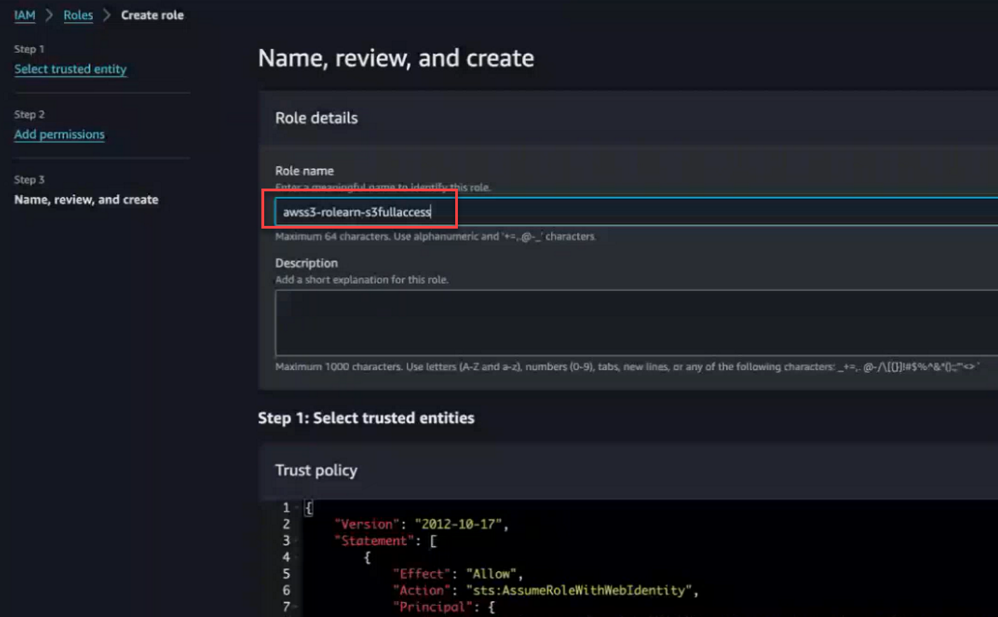
- Scroll down, and click Create role.
- Navigate to the newly created role to get its ARN.
Note the ARN string:
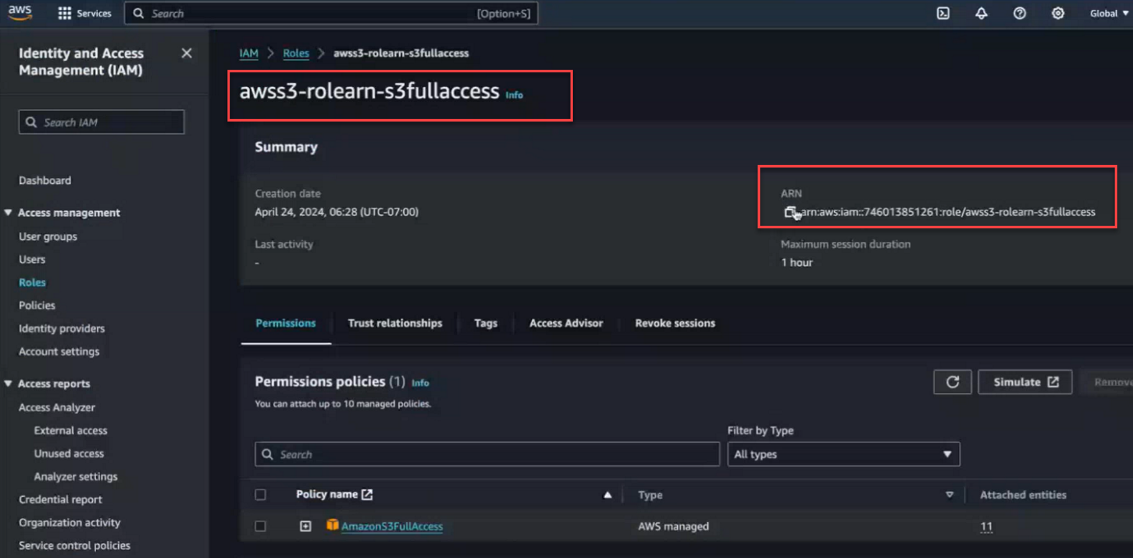
You must provide the ARN in the next set of steps when you use themaprclicommand to import AWS S3 into the global namespace by using STS.
Importing the External AWS S3 Object Store by Using the maprcli Command
maprcli clustergroup addexternal
command is enhanced with a new option to support STS-based access. The command,
which is used to import external S3 servers, includes a new
-awswebidrolearn option. To enable STS when you run the
command, you must:- Specify the
-awswebidrolearnoption - Set the
-typeoption tos3 - Set the
-s3vendoroption toaws
When you use these settings, Data Fabric ignores the
provided access key and secret key and ensures that S3 access for the server is
achieved through STS using the specified -awswebidrolearn.
maprcli clustergroup addexternal -type s3 -s3vendor aws -awswebidrolearn 'arn:aws:iam::74601xxxxxxx:role/Keycloak-webid-s3-readonly'Related maprcli Commands
maprcli command. A link to this command is provided for general
reference. For more information, see maprcli Commands in This Guide.