Configuring Spark Applications to Write and View Logs
This section guides you through configuring your Spark Application CRs to write logs in the event directory and view the Spark Application details in Spark web UI.
Configuring Spark Applications to Write Logs
Perform the following steps to configure the Spark Application CR to write logs to PVC:
- Configure the
volumesoptions underspecsection of SparkApplication as follows:volumes: -name: <some-name> persistentVolumeClaim: claimName:<same-volume-name-as-in-history-server>For example:
volumes:
  -name: data
  persistentVolumeClaim:
    claimName: spark-pvc
You must ensure the
claimNameis the same name asExistingClaimNameinvalues.yamlfile of the Helm chart. - Configure the
volumeMountsoption underDriverandExecutorpods as follows:volumeMounts: -name:<some-name> mountPath: "<same-path-as-event-directory-on-history-server>"For example:volumeMounts: -name: data mountPath: "/mnt/hs-logs"You must ensure the
mountPathis the same path aseventsDirpath invalues.yamlfile of the Helm chart. - Configure the
sparkconfoptions of SparkApplication for Spark Event Log Service as follows:"spark.eventLog.enabled": "true" "spark.eventLog.dir": "<same-path-as-event-directory-on-history-server>"For example:"spark.eventLog.enabled": "true" "spark.eventLog.dir": "file:/mnt/hs-logs" - Run the following command to submit the Spark
Application:
kubectl apply -f <path-to-example-spark-application-CRs>
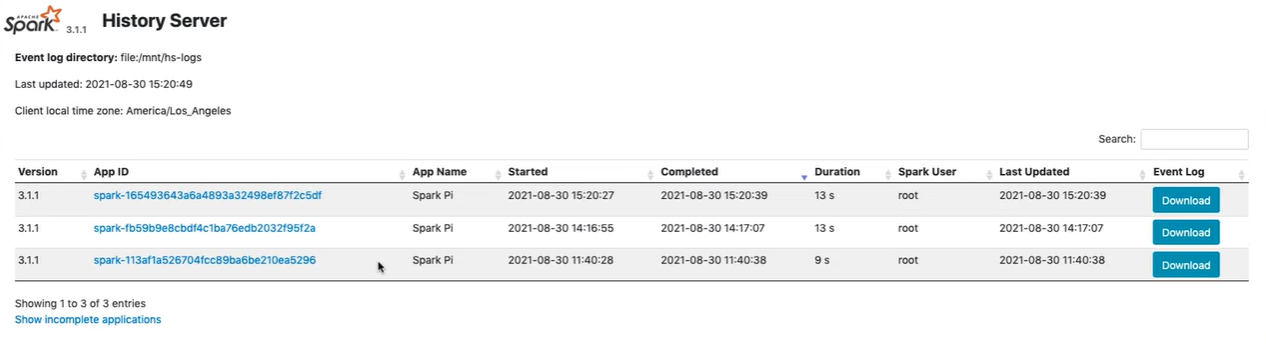
Viewing Application Details Using Web UI
You can view the application details for Completed, Failed (completed but failed), or Running Spark Applications using the Spark history web UI.
Run the export command to get the node IP and node port to navigate to the Spark web
UI.
export NODE_PORT=$(kubectl get --namespace {{ .Release.Namespace }} -o jsonpath="{.spec.ports[0].nodePort}" services {{ include "spark-hs-chart.fullname" . }}) export NODE_IP=$(kubectl get nodes --namespace {{ .Release.Namespace }} -o jsonpath="{.items[0].status.addresses[0].address}")echo http://$NODE_IP:$NODE_PORTAccess the Spark History Server web UI using the following
URL:
http://<NODE_IP>:<NODE_PORT>The default node port is 18080.
Monitor the status of all applications using the following
URL:
http://<NODE_IP>:<NODE_PORT>/api/v1/applicationsView the details of single application using the following
URL:
http://<NODE_IP>:<NODE_PORT>/api/v1/applications/<spark-job-id>NOTE
There is a limitation related to Spark History Server with Amazon S3. See Spark Limitations.