Managing Spark Applications
This topic describes how to view and manage Spark applications using HPE Ezmeral Runtime Enterprise new UI.
About this task
View and manage the status of all the Spark applications and scheduled Spark applications.
Procedure
-
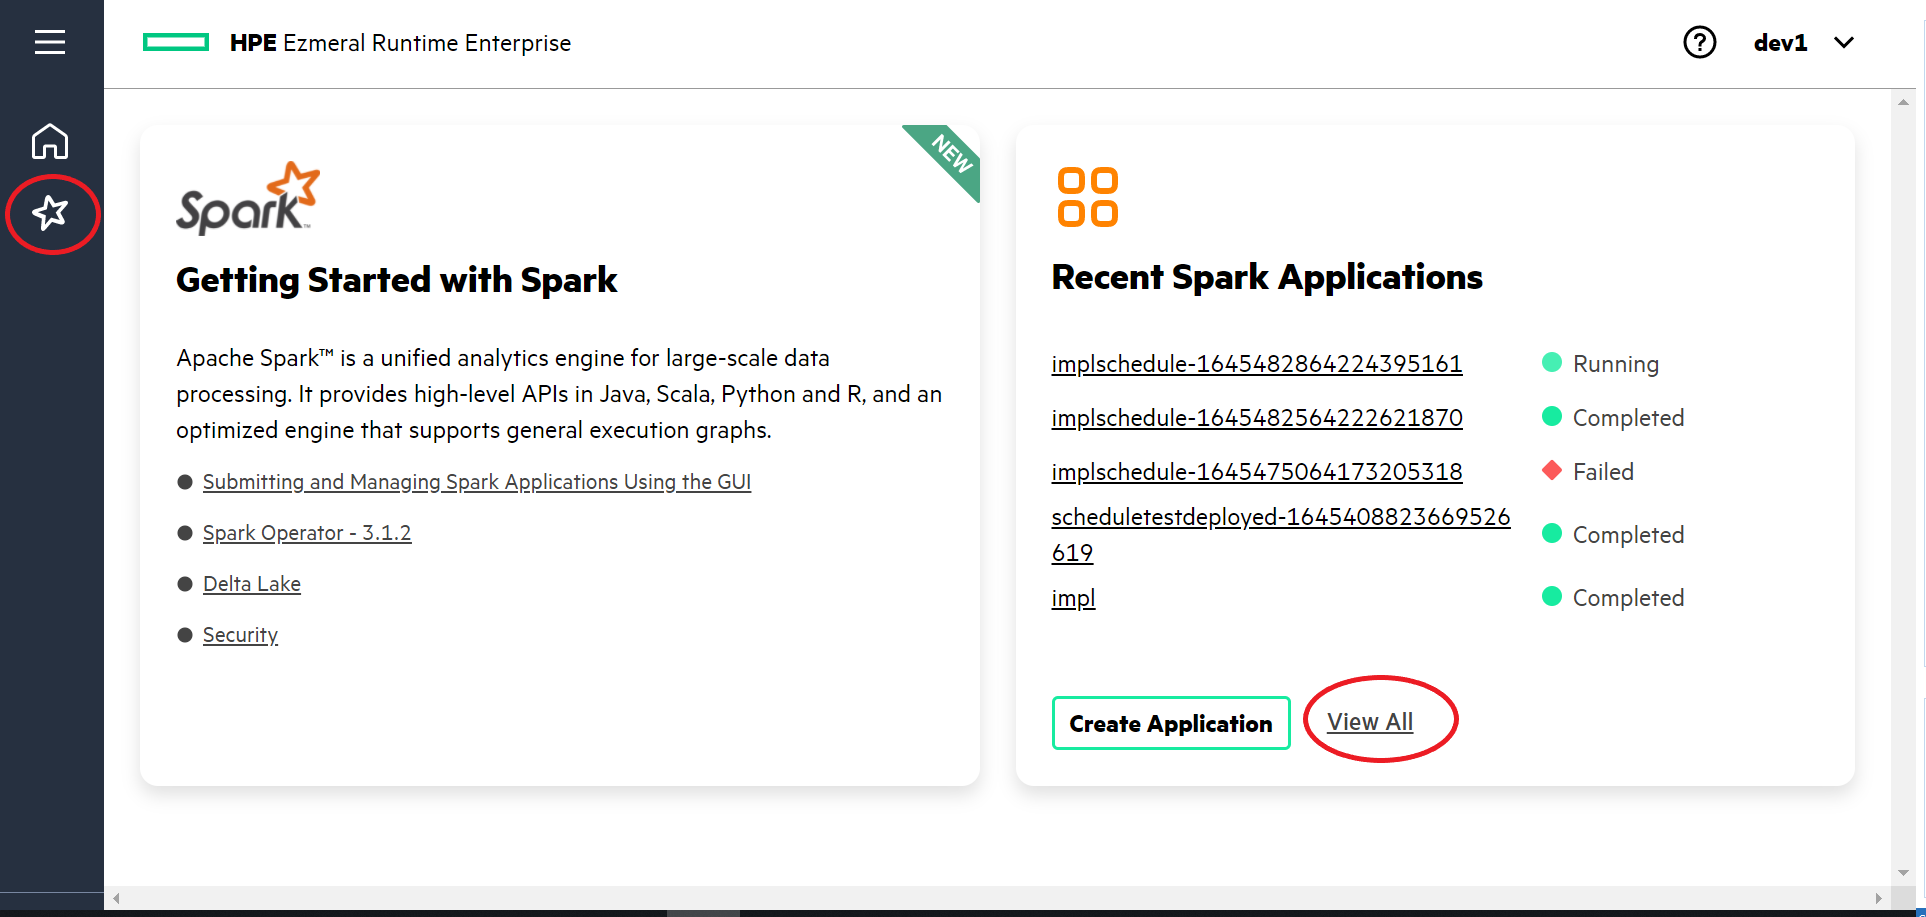
Click the Spark icon on the left navigation bar or click
View All in HPE Ezmeral Runtime Enterprise new UI home page.
-
To view actions you can perform on Applications and
Scheduled Applications tab, click the menu
icon in the Actions column.
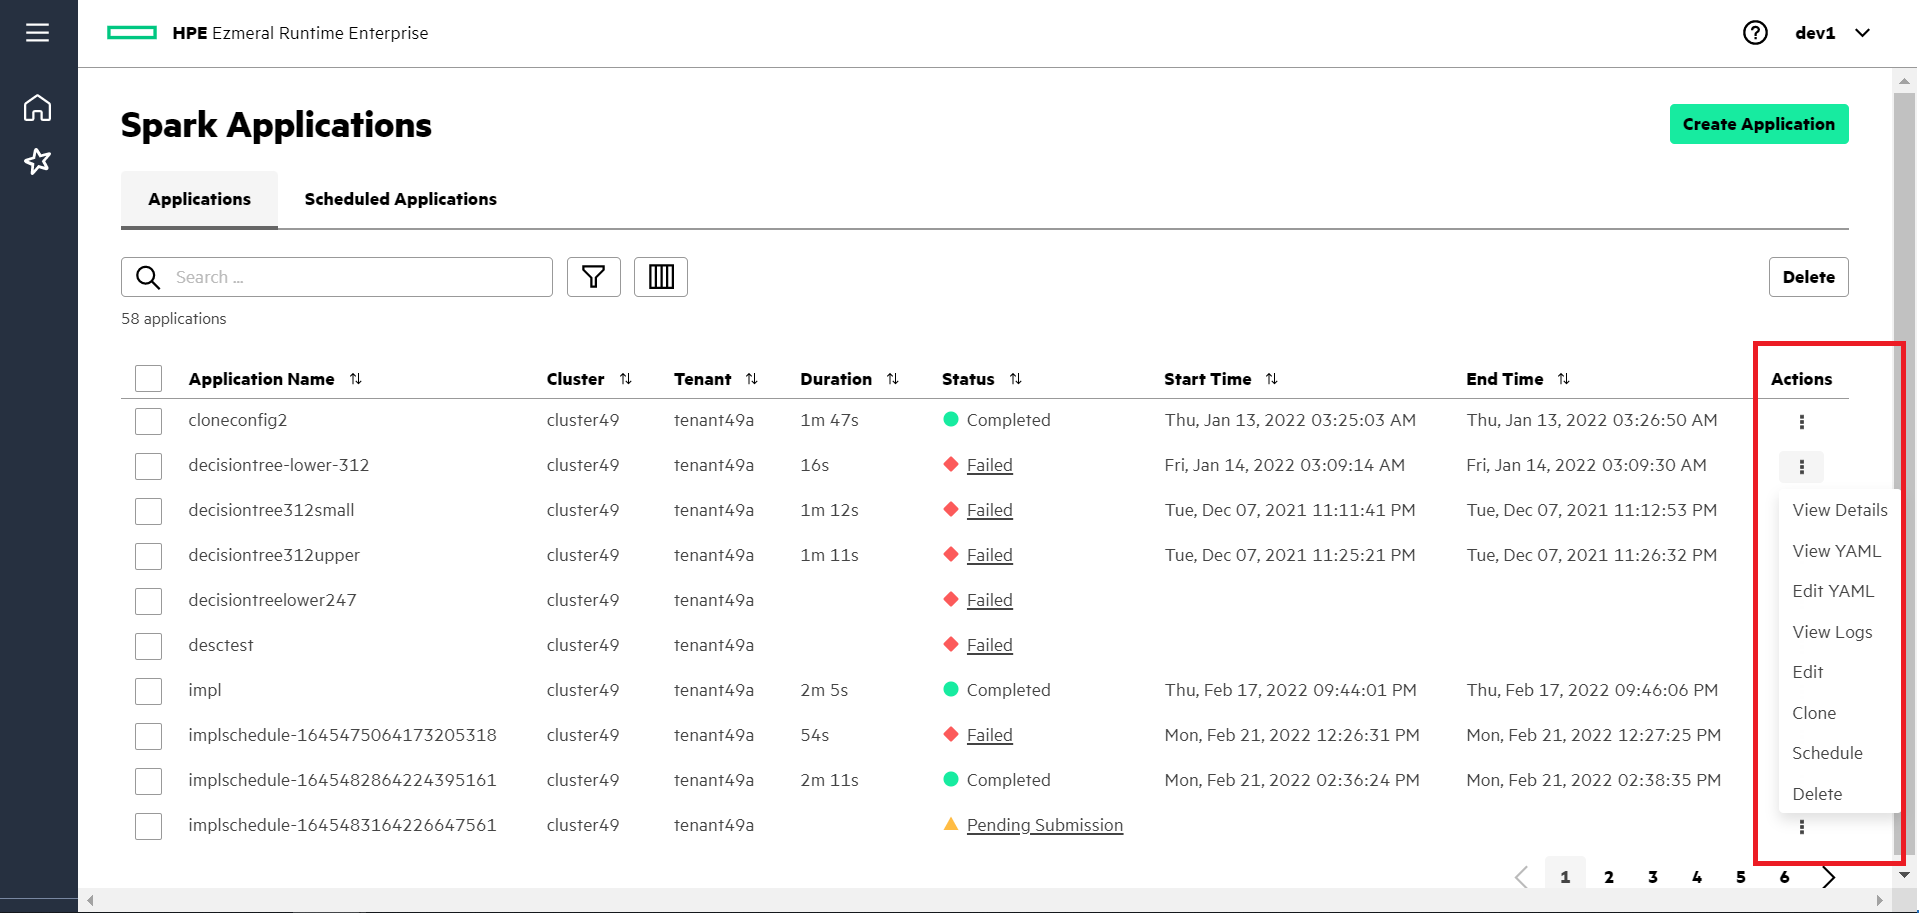
- View Details:
- To view the details of an application, including CPU, memory usage, and events and logs of the pods, select View Details.
- View YAML:
- To view the YAML file and see the configuration details, select View YAML.
- Edit YAML:
- To open an editor to change the application configuration using a YAML in the GUI, click Edit YAML. You can use the editor to add the extra configuration options not available through application wizard. To apply the changes, click Update Application. To cancel the changes, click Discard Changes.
- View Logs:
- To view the Spark driver pod logs, select View Logs.
- Edit:
- To change application configurations and resubmit the application, select Edit.
- Clone:
- To create a new Spark application with the similar configuration as an existing Spark application, select Clone. You can update any application parameters and submit it as a new application.
- Schedule:
- To schedule the application, click Schedule. You can view this application in the Scheduled Applications tab. To learn more about the Schedule Application step, see Creating Spark Applications.
- Suspend:
- To stop the application from running at its scheduled time, select Suspend from the Actions menu in the Scheduled Applications tab.
- Resume:
- To restart the schedule of the suspended applications, select Resume from Actions menu on Scheduled Applications tab.
- Delete:
- To delete the Spark application, select Delete.
-
Delete multiple Spark applications at once:

- To select multiple applications, click the check box besides Application Name in the table.
- Click Delete on the top right pane of the table.
-
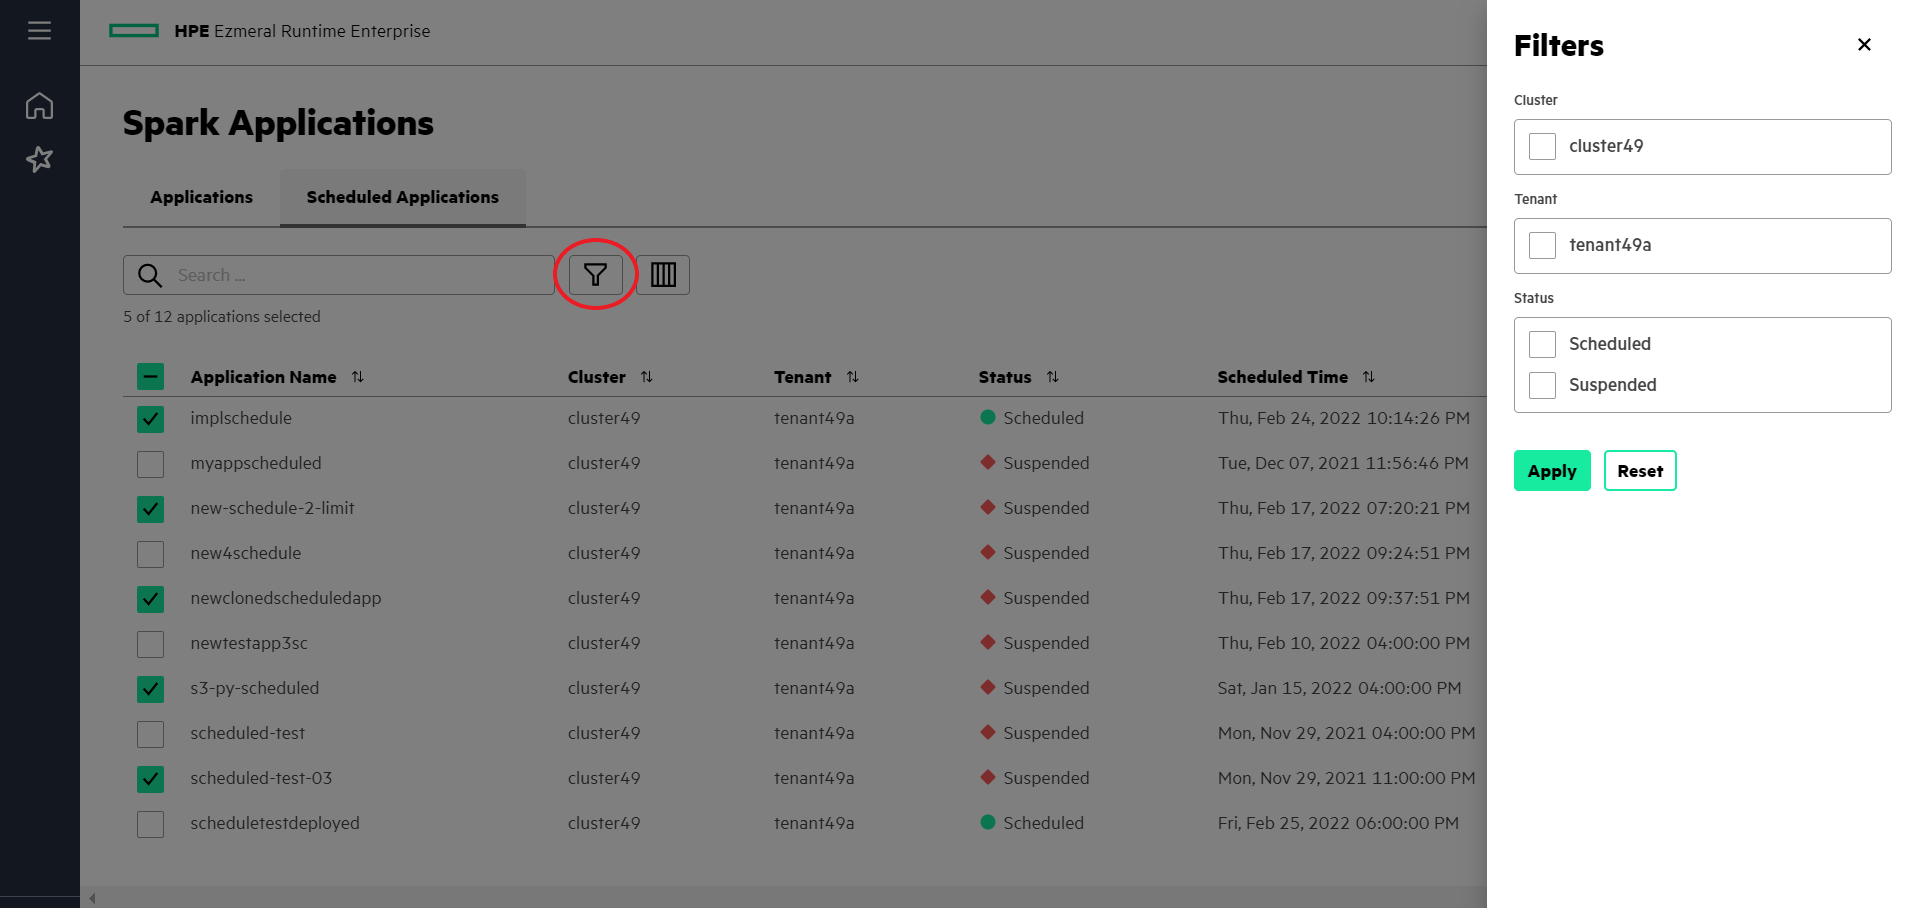
To display the Spark applications according to the clusters, tenants, and
status, click Filter icon.
-
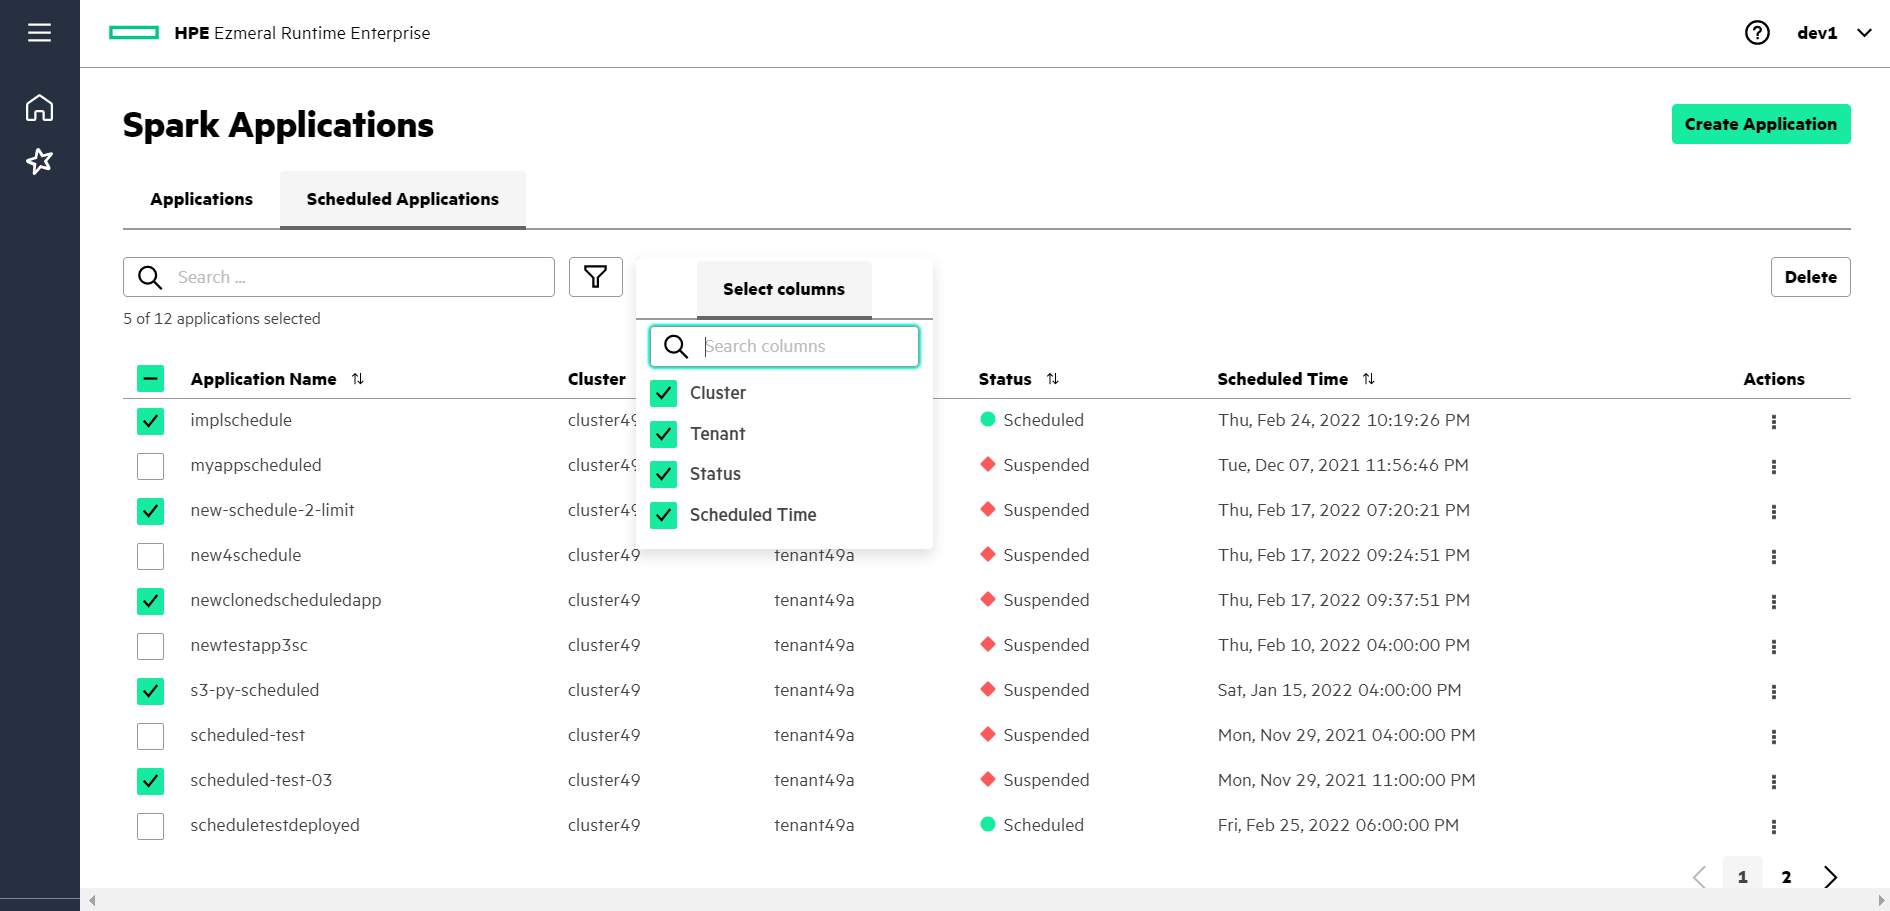
To select the columns to display on your applications table, click
Columns icon.