Creating a New User (Local)
If you are a Platform Administrator and the deployment is set to use local authentication (see User Authentication), then clicking the Add User button in the User Management screen opens the Add New User screen.
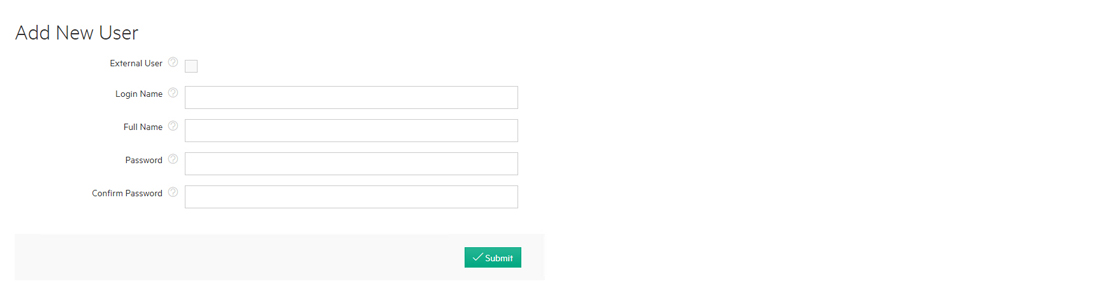
When the deployment is configured to use platform authentication, then clicking the Add User button in the User Management screen opens the following Add New User screen:
NOTE If the deployment is configured to use external authentication, then you
will need to add the user to your LDAP/AD service. The new user will receive the roles
mapped to their assigned group.
To create a new user:
- If you are manually adding an external (LDAP/AD/SAML) user to the deployment, then see Manually Added; otherwise, proceed to Step 2.
- Enter a unique user name in the Login Name field. This name is case sensitive.
- Enter the full name of the user in the Full Name field.
- Enter a password in the Password field, and then reenter the same password in the Confirm Password screen. Passwords are case sensitive. The user may change her or his password as described in Changing Your Password.
When you have finished entering the information for the new user, click Submit to save your changes. You may now assign the user to one or more tenants/projects, as described in Assigning/Revoking User Roles (Local).
NOTE You may only create a new user via this function if the deployment is
configured to use the local user database. If you use an external authentication server
to manage logins, then you need to create the user account on that authentication
server.