Tutorial: Transition from KubeDirector to Kubeflow Training
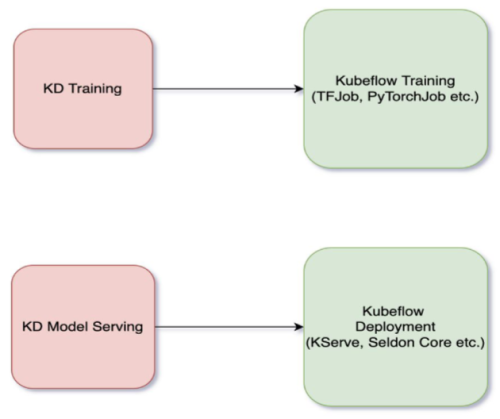
This tutorial provides a use case to help transition from KubeDirector training and deployment to Kubeflow equivalents.
- This tutorial assumes you have an existing KubeDirector notebook cluster up and running.
- Before beginning this tutorial, download the KubeDirector transition tutorials zip file, which contains sample files for all the included KubeDirector tutorials.
Tutorial 1: Transition From KubeDirector Training to TFJob
- Provision the KubeDirector Training cluster:
- Run the
training.yamlfile included undertemplates:kubectl apply -f training.yaml -n <tenant> - Check the provisioning status of the
cluster:
kubectl get pods -n <tenant> | grep train1 - Run the notebook example
training_sample.ipynb. This notebook example runs the sample Tensorflow script using the KubeDirector Training cluster.
- Run the
- Run the Tensorflow job:
Next, run the same training script using Kubeflow TFJob.
You can run the scripts for this step using the
tutorial.ipynbnotebook included in both thetensorflow/KServeandtensorflow/Seldonfolders. Select the folder corresponding to the type of inferencing that you want to run.The steps in the notebook are explained in detail below.
- Create an image that includes the required scripts and relevant datasets from the sample zip file. This image acts as the basis of the TFJob utility. Ensure that the required training and dataset files are available in your local machine.
- You must have access to a Docker daemon to build and push the
created image to a compatible docker registry. To install Docker,
see this page in the official
Docker documentation (link opens an external site in a new tab or
window).
Ensure you have access to a Docker registry which is accessible from the HPE Ezmeral Runtime Enterprise cluster.
- Run the scripts using the
tutorial.ipynbnotebook. This notebook is included in both theKServeandSeldonfolders. Select the folder corresponding to the type of inferencing you want to run.The steps included in the notebook are as follows:
- Create a basic Docker file following the template in Dockerfile. Make sure to include the datasets and the scripts to the image provided in the sample.
- After the image is ready, build and push the image to the
registry:
docker build -t <docker_image_name_with_tag>docker push <docker_image_name_with_tag>The pushed image now serves as the base image during the training phase.
- Before beginning training, create a PVC for the saved model:
- Open and apply the PVC YAML available as part of the training
folder:
kubectl apply -f tfjob-pvc.yaml - Verify that the PVC is created and in a bound
state:
kubectl get pvc
- Open and apply the PVC YAML available as part of the training
folder:
- Apply the TFJob CR YAML to run the training:
- If you are using Kserve inferencing:
kubectl -n <namespace> apply -f tfjob_kserve.yaml - If you are using Seldon
inferencing:
kubectl -n <namespace> apply -f tfjob_seldon.yaml
- If you are using Kserve inferencing:
- A TFJob is created and a pod is provisioned to run the training. The output
of the training is a file that exists in the associated
PVC:
When the pod enters a complete state, the model building is complete. You can now deploy the generated model with KServe or Seldon. See:kubectl get pods -n <namespace> | grep tfjob
Tutorial 2: Transition From KubeDirector Training to PyTorchJob
examples/mlflow/PyTorch_sample.ipynb as an example. Sample
scripts for this tutorial are located in the tutorials/pytorch
folder in the sample zip file.- Upload the notebook
PyTorch_sample.ipynbto your KubeDirector notebook cluster. Familiarize yourself with the script. Then proceed with the following steps to run the same script as a part of Kubeflow PyTorchJob. - Create an image that includes the required scripts and relevant datasets from the sample zip file. This image acts as the basis of the PyTorchJob utility. Ensure that the required training and dataset files are available in your local machine.
- You must have access to a Docker daemon to build and push the created image
to a compatible docker registry. To install Docker, see this page in the official Docker documentation
(link opens an external site in a new tab or window).
Ensure you have access to a Docker registry which is accessible from the HPE Ezmeral Runtime Enterprise cluster.
- Create a basic Docker file following the template in Dockerfile. Make sure to include the required datasets and the scripts to the image.
- After the image is ready, build and push the image to the
registry:
docker build -t <docker_image_name_with_tag>docker push <docker_image_name_with_tag> - The pushed image now serves as the base image during our training phase.
Before we start training, ensure storage for the saved model. Create a
PVC:
- Open and apply the PVC YAML available as part of the training
folder:
kubectl apply -f pytorch-pvc.yaml - Verify that the PVC is created and in a bound
state:
kubectl get pvc
- Open and apply the PVC YAML available as part of the training
folder:
- Apply the PyTorch CR YAML to run the
training:
kubectl -n <namespace> apply -f pytorch.yaml - A PyTorchJob is created and a pod is provisioned to run the training. The
output of the training is a model file that exists in the associated
PVC:
When the pod enters a complete state, the model building is complete. You can now deploy the generated model with Seldon Core. See: Tutorial 4: Inferencing with Seldon Core.kubectl get pods -n <namespace> | grep tfjob1-sample-worker-0
Tutorial 3: Inferencing with KServe
- Obtain the
KServe/inference_kserve.yamlfile from thetensorflowdirectory in the sample zip file. - Apply
KServe/inference_kserve.yamlto the tenant namespace:kubectl apply -f KServe/inference_kserve.yaml -n <namespace> - Ensure that the pods are up and running. You can track the status of the
serving deployment with the following
commands:
kubectl get inferenceserviceskubectl get pods | grep tfjob-serving - After the pods are up and running, send a request to the model.
Sample requests are available under
tensorflow/kserve/requests_kserve.py.- In the Jupyter Notebook terminal, install the following Python
dependencies:
pip install requests lxml --user - From the Jupyter notebook, launch
kserving-request.pyas follows:
The output appears similar to the following:python kfserving-request.py http://<kserve-service>-default.<tenant-name>.svc.cluster.local:80200 {u'predictions': [[0.841960549]]}
- In the Jupyter Notebook terminal, install the following Python
dependencies:
Tutorial 4: Inferencing with Seldon Core
- Obtain the
inference_seldon.yamlfile from thetensorflowdirectory in the sample zip file. - Apply
inference_seldon.yamlto the tenant namespace:kubectl apply -f inference_seldon.yaml -n <namespace> - Ensure that the pods are up and running. You can track the status of the
serving deployment with the following
commands:
kubectl get sdepkubectl get pods | grep tfserving - After the pods are up and running, send a request to the model.
Sample requests are available under
tensorflow/seldon/requests_seldon.py.- In the Jupyter Notebook terminal, install the following Python
dependencies:
pip install requests lxml --user - From the Jupyter notebook, launch
seldon-request.pyas follows:
The output appears similar to the following:python seldon-request.py http://<seldon-service>.<tenant-name>.svc.cluster.local:8000200 {u'predictions': [[0.841960549]]}
- In the Jupyter Notebook terminal, install the following Python
dependencies: