Using Self-Signed Certificates with the Data Fabric Cluster
An initialization script generates private keys and self-signed certificates when a Data
Fabric cluster is created. The edftool includes several commands that
allow these certificates to be self-signed using the following workflow:
- Generate Certificate Signing Requests (CSRs) for the Data Fabric cluster services.
- Custom-sign the certificates.
- Import the signed public certificates back into the cluster and insert them into
the
ssl_keystoreandssl_truststorefor each service. - Restart each service.
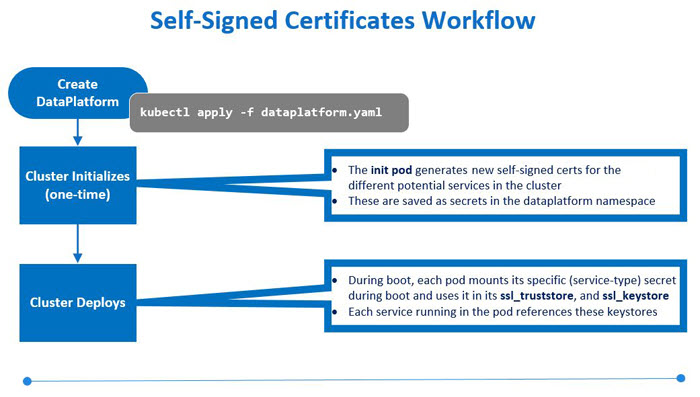
Workflow
An initialization pod generates self-signed certificates for the services supported
by the Data Fabric when you create the Data Fabric and apply the example CRs. This information
is saved as secrets in the data-platform namespace. Each service
pulls its specific private and public keys from those secrets during cluster
deployment.
Self-signed certificates may not meet environment security requirements, such as requiring certificates signed by a Certificate Authority (CA). The following diagram illustrates how you can generate new public certificates, sign them, and import them into the cluster:
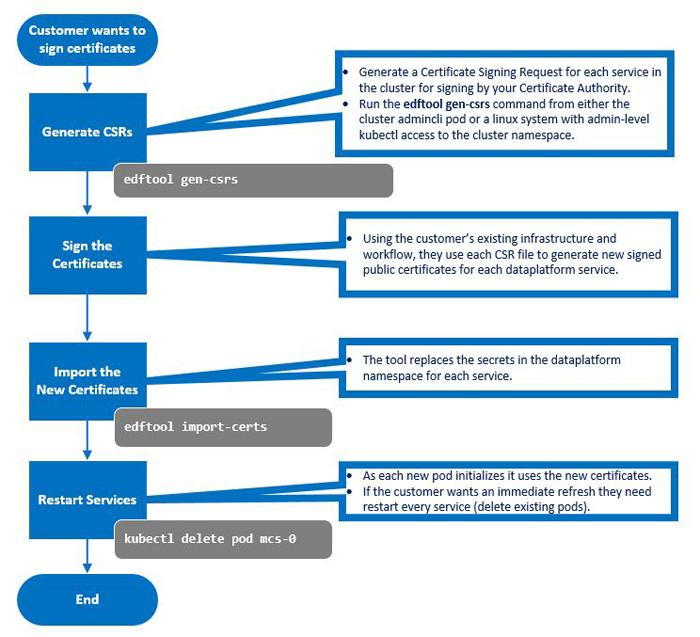
Use the edftool to generate CSRs for each service:
edftool
uses a
.cnf
template file to generate the CSRs. By default, this template is
stored in
/opt/mapr/kubernetes/template.cnf
. If needed, you can specify a different template file by
executing the
edftool gen-csrs
command.
-
Execute the following command on either the Kubernetes cluster or the client where the
edftoolis installed:kubectl exec -it -n <pod-namespace> admincli-0 -- /bin/bash -
Execute the following command to allow the files to be created:
cd /tmp -
Execute the following command:
edftool gen-csrsThe tool examines the current secrets, looks up each service, and determines the current signing status. For example: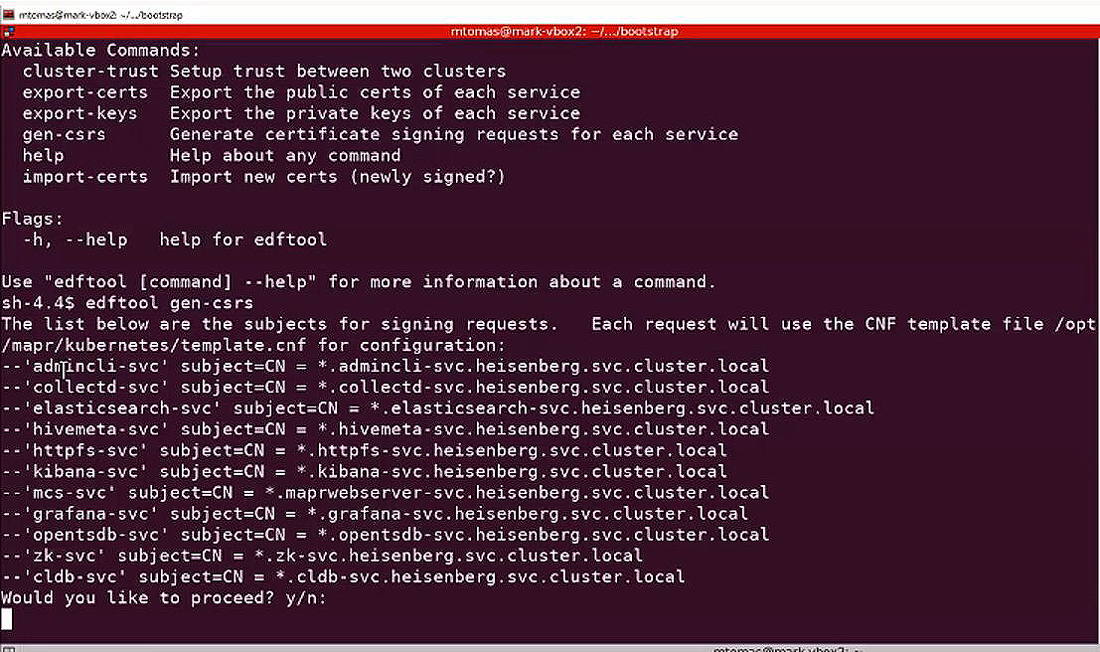
-
Enter yes at the following prompt to continue the process:
Would you like to proceed? y/n: -
Execute the
lscommand to verify CSR generation. For example: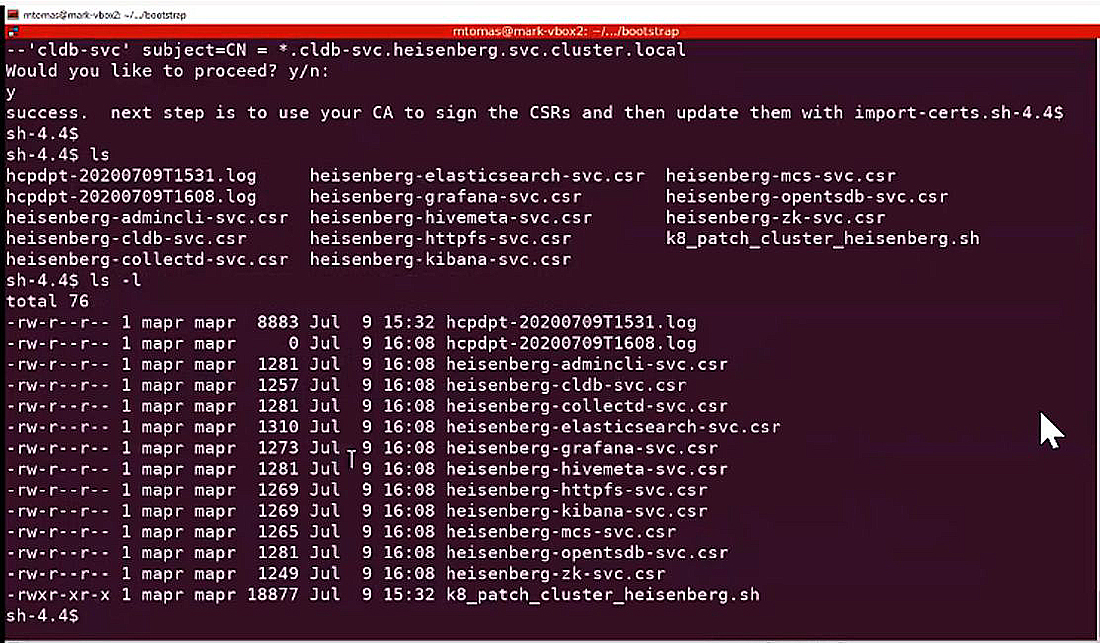
- Use the
.csrfiles and your company-specific processes to generate new, signed public certificates for each Data Fabric service using SCP or another tool to export each.csrfile to your CA-signing server. This process generates.crtfiles (certificates) for each.csrfile. - Use SCP or another tool to move the resulting
.crtfiles to the working directory on the Data Fabric cluster. -
Import the new certificates and replace the secrets in the
Data Fabricnamespace for each service by executing the following command:edftool import-certs -
Enter
yesat the following prompt to continue the process:Would you like to proceed? y/n: -
Restart the CLDB and Zookeeper pods by executing the
edf update
                            cluster
command in theadmincli-0pod in/usr/bin. For example:kubectl exec -it admincli-0 -n <pod-namespace> -- /bin/bash edf update cluster -
For the other services, delete the pod for the service to cause a replacement pod to start, initialize, and use the certificates by executing the following command:
kubectl delete pod <service-pod-name>For example:
kubectl delete pod mcs-0