Importing Frameworks
Describes how to import frameworks in HPE Ezmeral Unified Analytics Software.
Prerequisites
- Sign in to HPE Ezmeral Unified Analytics Software as Administrator.
- Configure Istio Virtual Service to expose the
endpoint. Virtual Service Example
apiVersion: networking.istio.io/v1alpha3
kind: VirtualService
metadata:
  name: {{ include "test-app.fullname" . }}
  namespace: {{ .Release.Namespace }}
  labels:
    {{- include "test-app.labels" . | nindent 4 }}
spec:
  gateways:
    - {{ .Values.ezua.virtualService.istioGateway }}
  hosts:
    - {{ .Values.ezua.virtualService.endpoint }}
  #The following virtualService options are specific and depend on the application implementation.
  #This example is a simple application with single service and simple match routes.
  #The URL should point to the corresponding service.
  #Kubernetes provides an internal DNS mapping for services using the format <ServiceName>.<ServiceNamespace>.svc.cluster.local.
  http:
    - match:
        - uri:
            prefix: /
      rewrite:
        uri: /
      route:
        - destination:
            host: {{ include "test-app.fullname" . }}.{{ .Release.Namespace }}.svc.cluster.local
            port:
              number: {{ .Values.service.port }}
Configure thevalues.yamlfile of your application chart as follows:ezua: ... #other EZUA options virtualService: endpoint: "test-app.hpe-staging-ezaf.com" istioGateway: "istio-system/ezaf-gateway" - Add the following configuration options for Kyverno policy to your
application chart.
apiVersion: kyverno.io/v1 kind: ClusterPolicy metadata: name: {{ printf "add-vendor-app-labels-%s-%s" .Release.Name .Chart.Name }} annotations: "helm.sh/hook": pre-install "helm.sh/hook-weight": "-5" "helm.sh/hook-delete-policy": before-hook-creation spec: background: false rules: - name: add-vendor-app-labels match: any: - resources: # list all namespaces defined by the chart here # if there are no namespace resource defined leave only .Release.Namespace namespaces: - {{ .Release.Namespace }} kinds: - Pod mutate: patchStrategicMerge: metadata: labels: hpe-ezua/type: vendor-service - Configure SSO for the applications you want to import. See SSO Support for Imported Frameworks.
- All the applications must be deployed as Helm charts. You must have the
tar.gzfile created from the Helm chart for the application you want to import.
About this task
In HPE Ezmeral Unified Analytics Software, you can bring your own Kubernetes customized runtimetools and frameworks. To start importing applications, follow these steps:
- Click the Tools & Frameworks icon on the left navigation bar.
- Click the Import Framework button on the top-right of
the Tools & Frameworks screen. Navigate through
each step within the Import Framework wizard:
-
Framework Details: Set the following boxes on the Framework Details step:
- Framework Name:
-
Enter the framework name.
- Version:
-
Enter the framework version.
- Description:
-
Enter the application description.
- Category:
-
Select the application category from Data Engineering, Analytics, or Data Science.
- Framework Icon:
-
Click Select File and browse the logo image for your application.
-
Framework Chart: Set the following boxes on the Framework Chart step:
- Helm Chart:
-
Select Upload New Chart to import a new application. A list of all previously imported applications appears in the dropdown. If you deleted the previously imported application and you want to import the same application again, you can choose that application option from the dropdown.NOTEIf you are using a bitnami helm chart for your imported applications in HPE Ezmeral Unified Analytics Software, you must set the
volumePermissionstotruein thevalues.yamlfile.
When Bitnami starts up, it creates a directory inside the container.volumePermissions: enabled: trueWhen you set this value to
true, it initiates the start of an init container that changes the owner of the PersistentVolume mount point.When you set this value to
false, the permissions remain unchanged, which prevents the creation of the directory, thus causing the container to fail. - Upload Helm Package tar.gz file:
-
Click Select File and browse the
tar.gzof your application Helm chart. - Namespace:
-
Enter the namespace for framework.
- Release Name:
-
Enter the name for this specific installation of Helm Chart.
- Wait:
-
To wait until all the necessary services, volumes, pods, are in ready state before successfully importing the applications, check Wait.
- Debug:
-
To get detailed information in error status, check Debug.
- Framework Values: Configure the
override valuesfile of your application by using the Helm Values (YAML) box. - Review: Review the framework details. Click the pencil icon in each section to navigate to the specific step to change the framework configuration.
-
- To import the framework, click Submit on the bottom right of the Review step.
Results
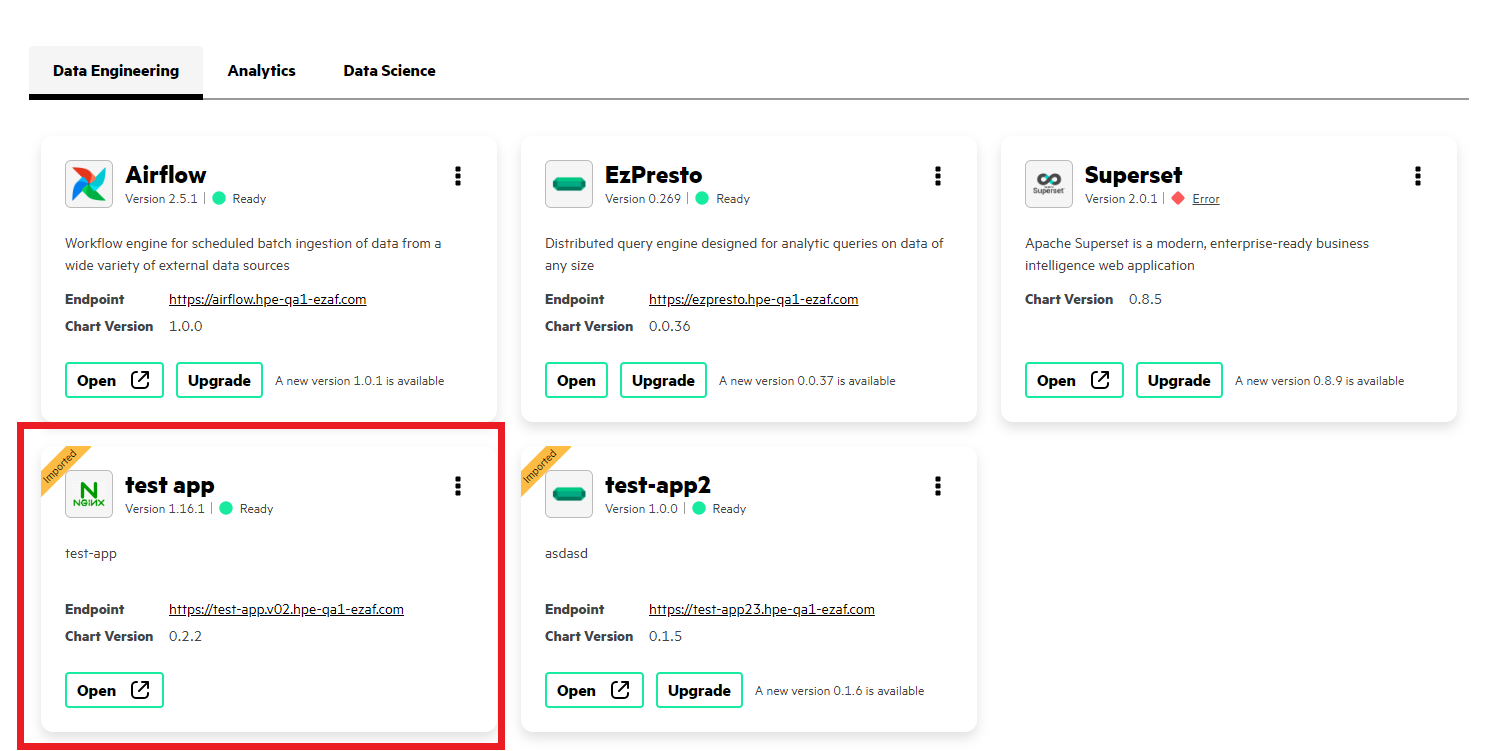
The application of your choice is imported and installed. You can view it on the Tools & Frameworks screen underneath your chosen application category.
For e.g.: If you imported test-app application under the Data Engineering category, you can view test-app on the Tools & Frameworks screen underneath the Data Engineering category.
